Join us for VS Code Live: Agent Mode Day on April 16th!
Dismiss this update
Testing Java in Visual Studio Code is enabled by the Test Runner for Java extension. It's a lightweight extension to run and debug Java test cases.
The extension supports the following test frameworks:
The Test Runner for Java works with the Language Support for Java™ by Red Hat and Debugger for Java extensions to provide the following features:
Install the Extension Pack for Java
Note: If you have already setup your Java test framework in your project, you can skip to the Features section.
Starting with Test Runner for Java version 0.34.0, you can enable a test framework for your unmanaged folder project (a project without any build tools) with just a few steps in the Testing Explorer:
Note: Currently this feature only supports unmanaged folders that do not contain any testing dependencies.
Add following configuration into your pom.xml:
<dependency>
  <groupId>junit</groupId>
  <artifactId>junit</artifactId>
  <version>(YOUR_JUNIT_VERSION)</version>
  <scope>test</scope>
</dependency>
Make sure following lines are added in your build.gradle:
plugins {
    java
}

dependencies {
    testImplementation('junit:junit:(YOUR_JUNIT_VERSION)')
}
If your project does not use any build tools, you can enable JUnit 4 via the Testing Explorer or by manually downloading the following JARs and adding them to the project classpath (via setting java.project.referencedLibraries, check Dependency management for more information):
You can check the official JUnit Wiki for more information about how to setup JUnit 4.
The JUnit 5 team provides a collection of sample projects with different build tools. Check the junit5-sample repository if your project uses Maven or Gradle as your build tool.
If your project does not use any build tools, you can enable JUnit 5 via the Testing Explorer or by manually including the junit-platform-console-standalone JAR in the project classpath (via setting java.project.referencedLibraries, check Dependency management for more information).
Add following configuration into your pom.xml:
<dependency>
  <groupId>org.testng</groupId>
  <artifactId>testng</artifactId>
  <version>(YOUR_TESTNG_VERSION)</version>
  <scope>test</scope>
</dependency>
Make sure following lines are added in your build.gradle:
plugins {
    java
}

dependencies {
    testImplementation('org.testng:testng:(YOUR_TESTNG_VERSION)')
}
If your project does not use any build tools, you can enable TestNG via the Testing Explorer or by manually downloading the following JARs and adding them to the project classpath (via setting java.project.referencedLibraries, check Dependency management for more information):
The Test Runner for Java extension will generate shortcuts (the green play button) on the left side of the class and method definition. To run the target test cases, select the green play button. You can also right-click on it to see more options.
The Testing Explorer is a tree view to show all the test cases in your workspace. You can select the beaker button on the left-side Activity bar of Visual Studio Code to open it. You can also run/debug your test cases and view their test results from there.
Sometimes you may want to customize the configuration to run your test cases. To achieve this, you can add the configuration into your workspace settings under the section: java.test.config.

Currently the supported configurations are:
java.test.defaultConfig.tasks.json (in the workspace's .vscode folder). The task will be launched before the start of testing.junit, testng.! as the prefix will be excluded. Note: This setting only takes effect when testKind is set to junitMore details can be found on the vscode-java-test Wiki.
After running/debugging the test cases, the state of the related test items will be updated in both editor decorations and the Testing Explorer.
You can trigger the command Test: Peek Output to peek the results view. You can select the links in the stack trace to navigate to the source location.
The extension provides features to help you scaffold test cases. You can find the entry in the editor context menu. Select Source Action... and then choose Generate Tests....
If you trigger this source action from your main source code (test subject), you will be asked the test class's fully qualified name and the methods you want to test. The extension will then generate the test code for you:
If you trigger the source action from your test source code, you will be asked which kinds of test methods you want to add. Including the lifecycle methods and the test method:
The extension provides features to help you navigate between your tests and test subjects. If your source code is contained in src/main/java or src/test/java, you can find the entry named Go to Test or Go to Test Subject in the editor context menu:
You can also find the command in the Command Palette (⇧⌘P (Windows, Linux Ctrl+Shift+P)) by searching for Java: Go to Test.
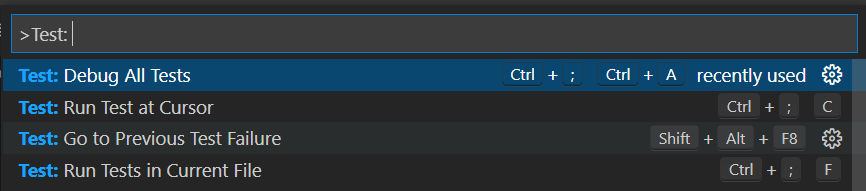
There are other testing commands (for example, Run Tests in Current File) that can be found by searching for 'Test:' in the Command Palette (⇧⌘P (Windows, Linux Ctrl+Shift+P)).
There are VS Code settings specific to testing that can be found by searching for 'testing' in the Settings editor (⌘, (Windows, Linux Ctrl+,)).

If you meet any problem when using the extension, you can review the FAQ and our issue list to check if there is an answer to your problem.
If you are interested in providing feedback or contributing directly to the code base, please read Contributing to Test Runner for Java, which covers the following:
Read on to find out about: